![[]](/images/loading-oval.svg) Please wait
Please wait

In order to use a design you must have the full rights to use the design. If you are unsure or have doubts over ownership, please confirm your ownership or seek permissions from the copyright owner.
The uploaded image was resized to meet the 25 megapixel limit for raster images. The image may appear to be smaller than intended. You can avoid the raster size limit by uploading artwork in vector format when possible.
You will be redirected to a page where you can request a quote for this blank product. Any decorations you have added to this product will be removed.
| Products | Qty | Price | |
|---|---|---|---|
| Total | $0.00 | ||
You have already used screen printing in this order. To avoid additional screen costs you can re-use an existing screen print design for this product.
Your layout contains images that have been resized to the point where they may appear blurred.
Your layout contains images that appear outside the design area.
You cannot save the product until you have moved the images within the design area.
Your layout contains images that appear outside the design area.
Your layout contains overlapping images.
You cannot save the product until you have moved the images so they are not overlapping.
Blank product purchase is not allowed
You will not be able to purchase this product until you add a decoration design.
Inactive blank product in use
Minimum quantity requirements not met
You will not be able to purchase this item until you have increased the quantity.
Screen(s) still updating...
You will not be able to purchase this item until all re-used screens have been updated.
Your layout contains images that have been resized to meet the 25 megapixel limit for raster images and they may appear smaller than intended. You can avoid the raster size limit by uploading artwork in vector format when possible.
By clicking OK, you are agreeing to accept the final product regardless of image quality. Click Cancel if you want to go back and fix the images.
HOW TO ADD A DESIGN
HOW TO ADD TEXT
DESIGNING TOOLS
Note: When submitting your own artwork or design, please send high resolution files, in black and white only.
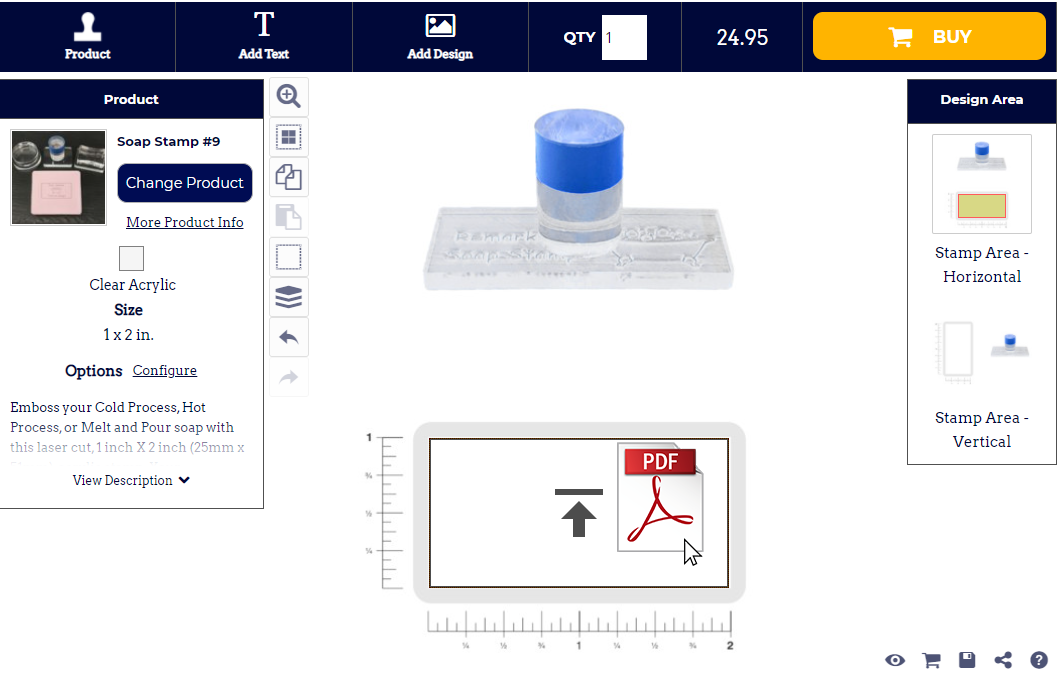
You will be adding a decoration to the 7in Rectangle of the Acrylic-Rectangle-7.
CONTENTS:
Click on the Change Product button in the Product panel.

The Select Product popup will be displayed.
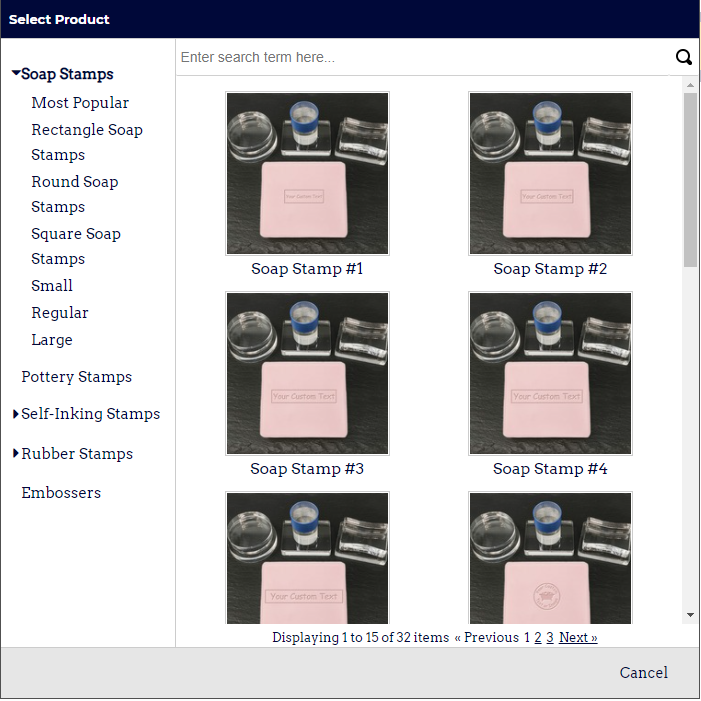
Choose a category on the left to find the product.
Click on a product to select it.
Click on the Product button in the Designer Toolbar.
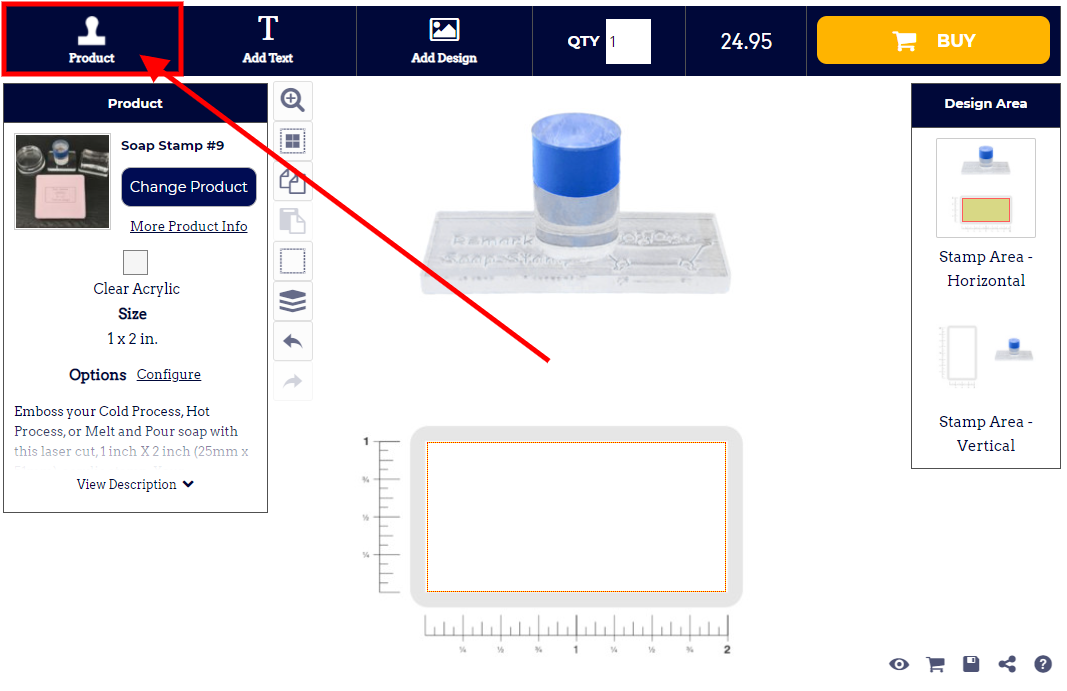
The Product panel is displayed.
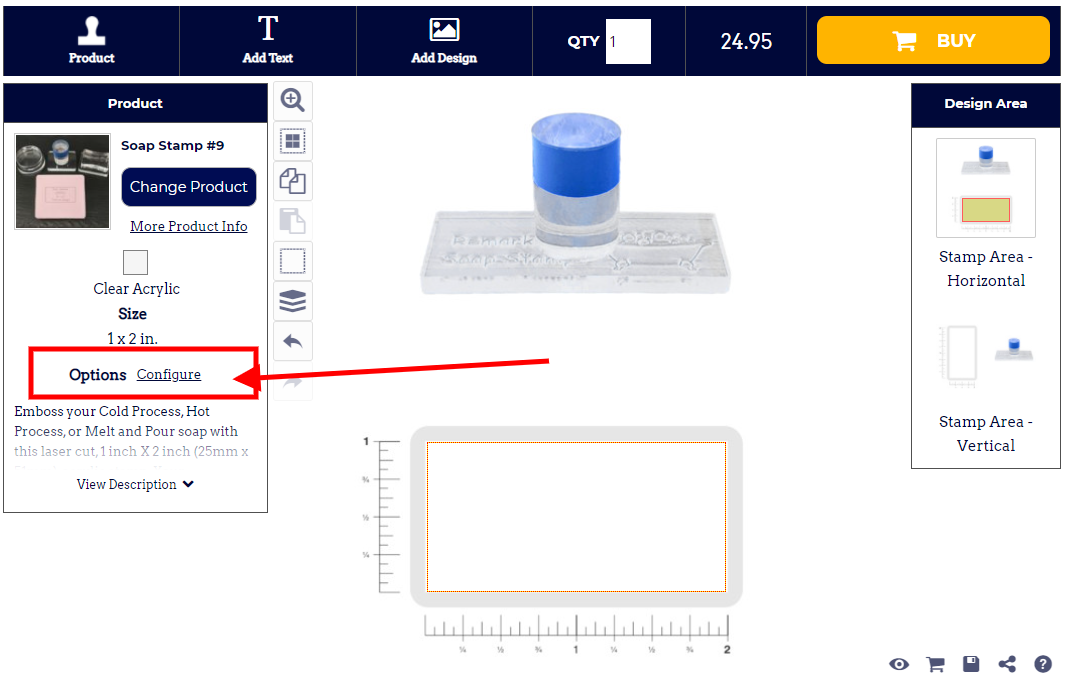
Click the Configure link to choose the product options
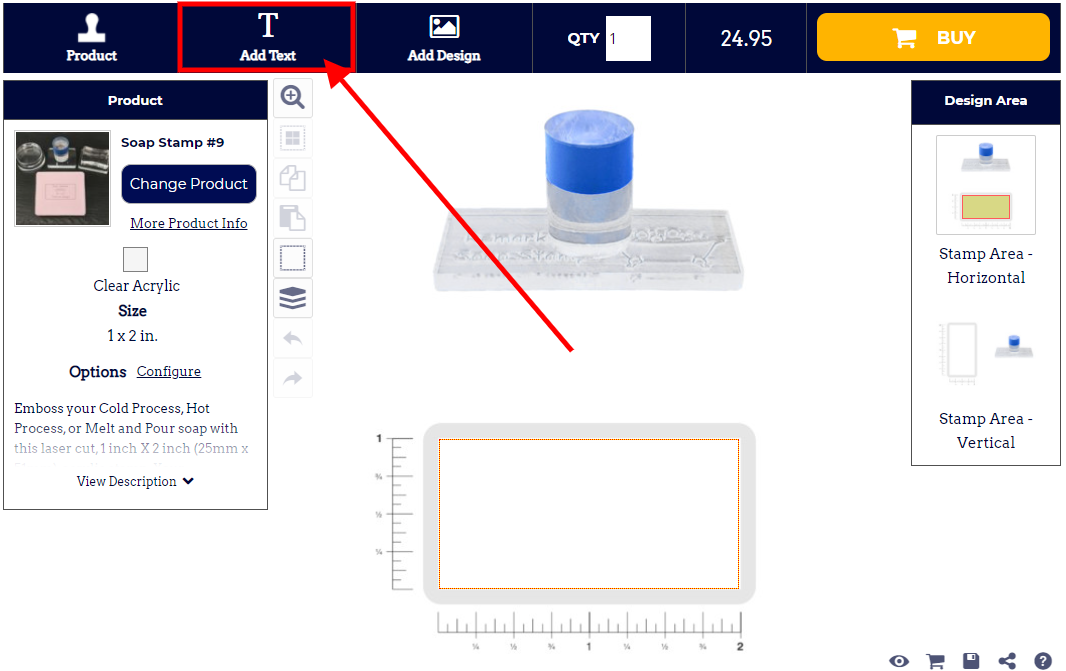
Click on the Add Text button in the Designer Toolbar.
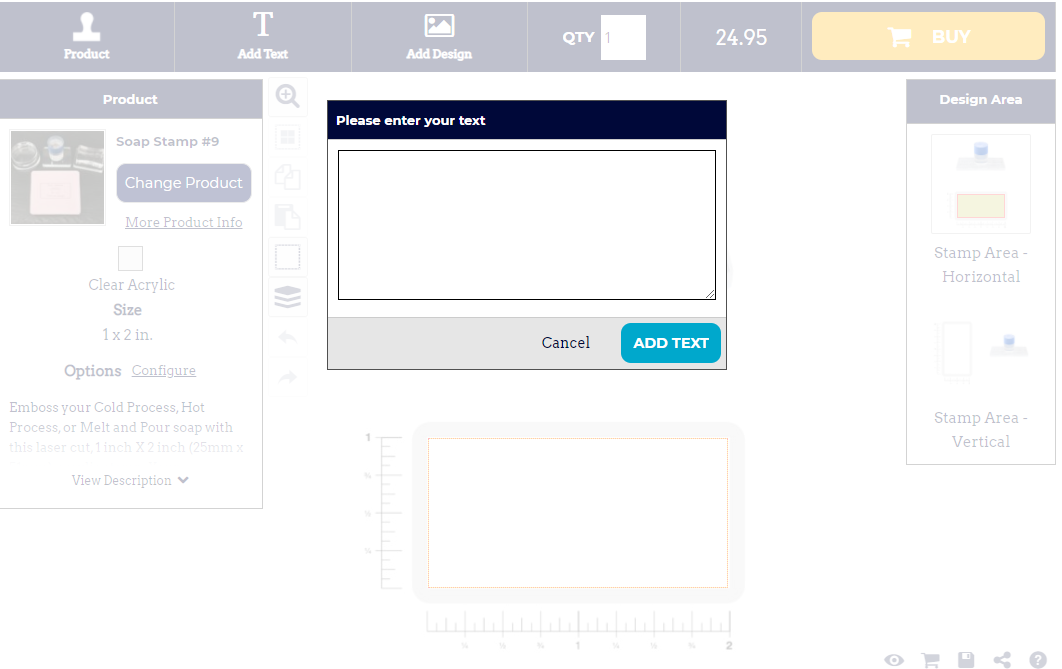
The text will appear inside the decoration area in its bounding box with editable size dimension, resize and rotate handles and delete control available.

Click the text object you wish to adjust the properties of.
The Text Properties panel will appear on the left side of the Designer.
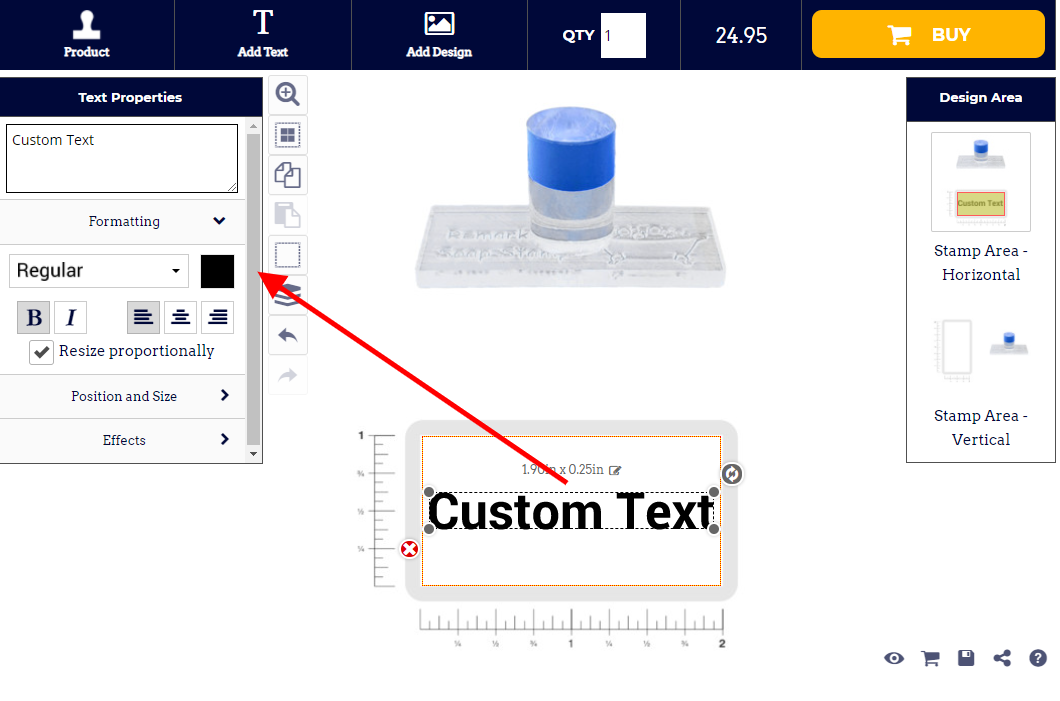
Configure the text as required:
The Formatting tab is expanded by default and contains the following controls:
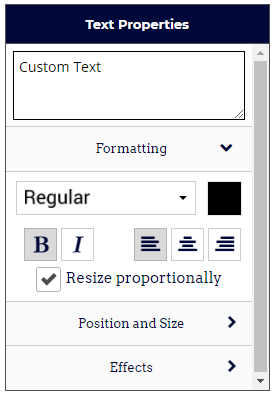
- Text Box: lets you edit the text
- Font: change the font via the Select A Font popup
- Font color: change the text color via the color popup
- Bold: boldens the text
- Italics: italicizes the text
- Left-align: aligns text to the left when it spans multiple lines
- Center-align: center-aligns text when it spans multiple lines
- Right-align: aligns text to the right when it spans multiple lines
- Resize Proportionally: when this checkbox is ticked, the text will keep its original proportions when you resize it
Position and Size
Click on the Position tab to expand it. Expanding the Position tab reveals the following controls:
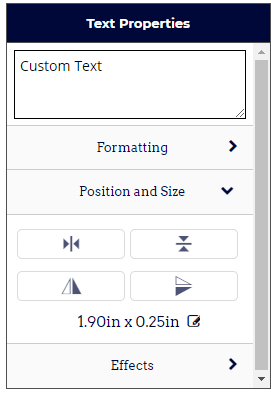
- Horizontal Centering controls: Horizontally centers the selected text
- Vertical Centering controls: Vertically centers the selected text
- Horizontal Flip controls: Horizontally flips or mirrors the selected text
- Vertical Flip controls: Vertically flips or mirrors the selected text
- Dimension controls: Change the dimensions of the selected text
Effects
Click on the Effects tab to expand it. Expanding the Effects tab reveals the following text effects:
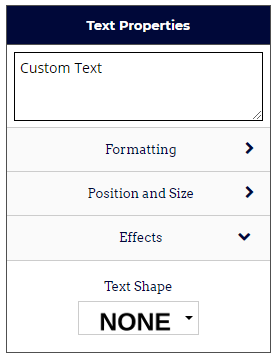
- Text Shape: lets you alter the shape of the text. The options indicate the shape that they will apply.
Click on the Add Design button in the Designer Toolbar.

Browse to and click on the design you want to add in the Select a design popup.
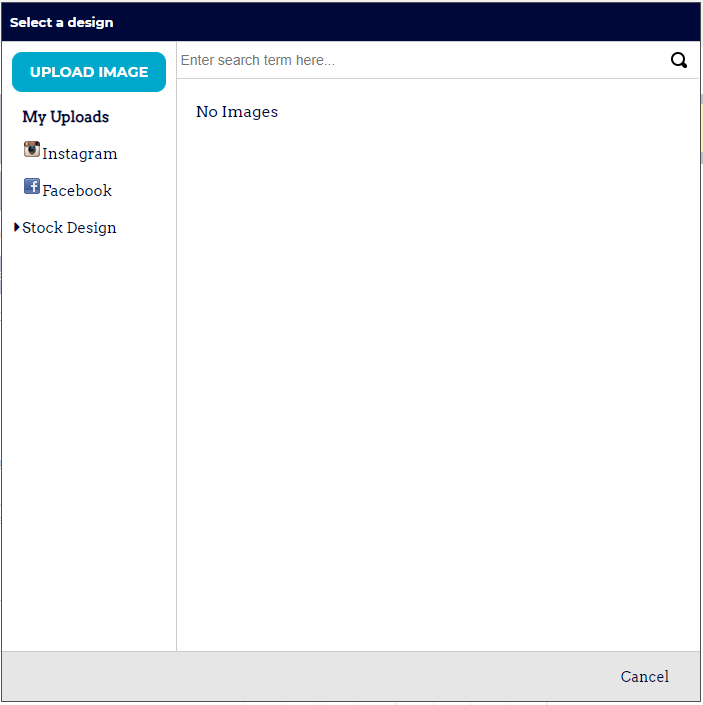
You can select designs from the following sources:
Raster and vector file types are supported in the formats as listed below:
Vector based graphics will have modifiable elements such as text and colors editable on the fly by users.
SELECT DESIGN - Click on the design or image you want to add it to the product.
The design will appear inside the decoration area in its bounding box with editable size dimension, resize and rotate handles and delete control available.
Drag a design file from your computer into the decoration area of the product in the Designer.
The decoration area will be highlighted when the mouse pointer is within its boundaries.
Release the mouse button to drop the design into the decoration area.
The system will begin uploading the design file to your own design library.
Tick the, I hereby declare I own the rights to print this image, checkbox in the Confirm Copyright Permission popup to verify that you have permission to use the design.
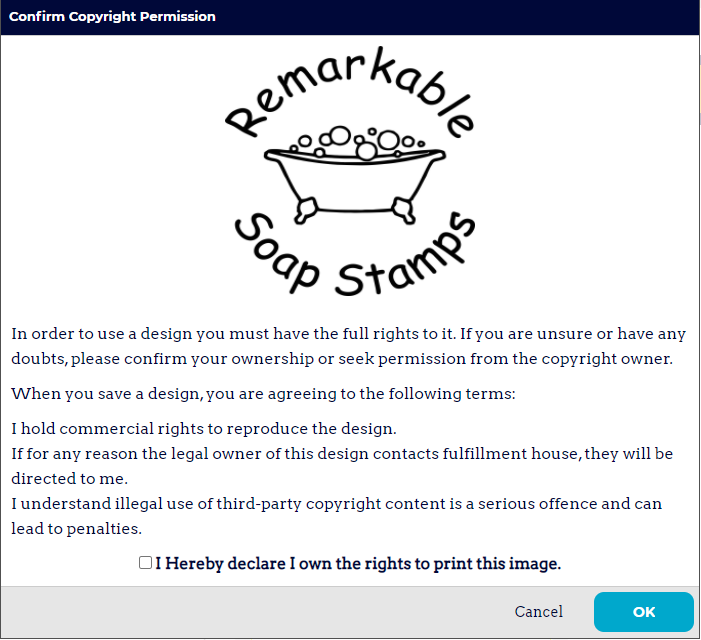
Click OK.
The design will appear inside the decoration area in its bounding box with editable size dimension, resize and rotate handles and delete control available.
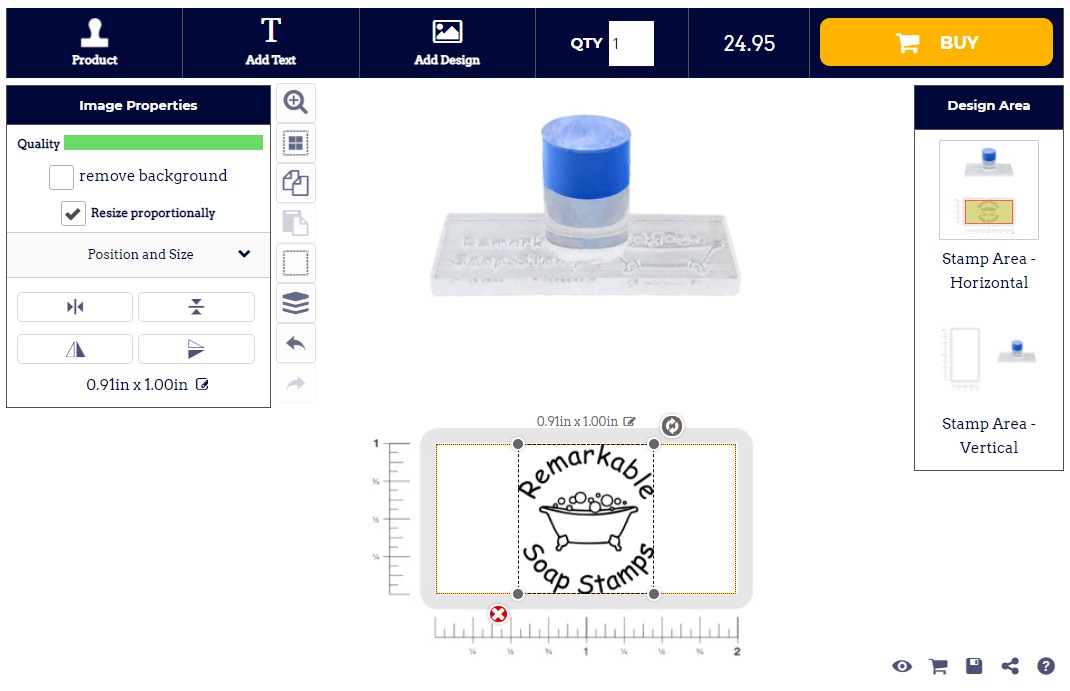
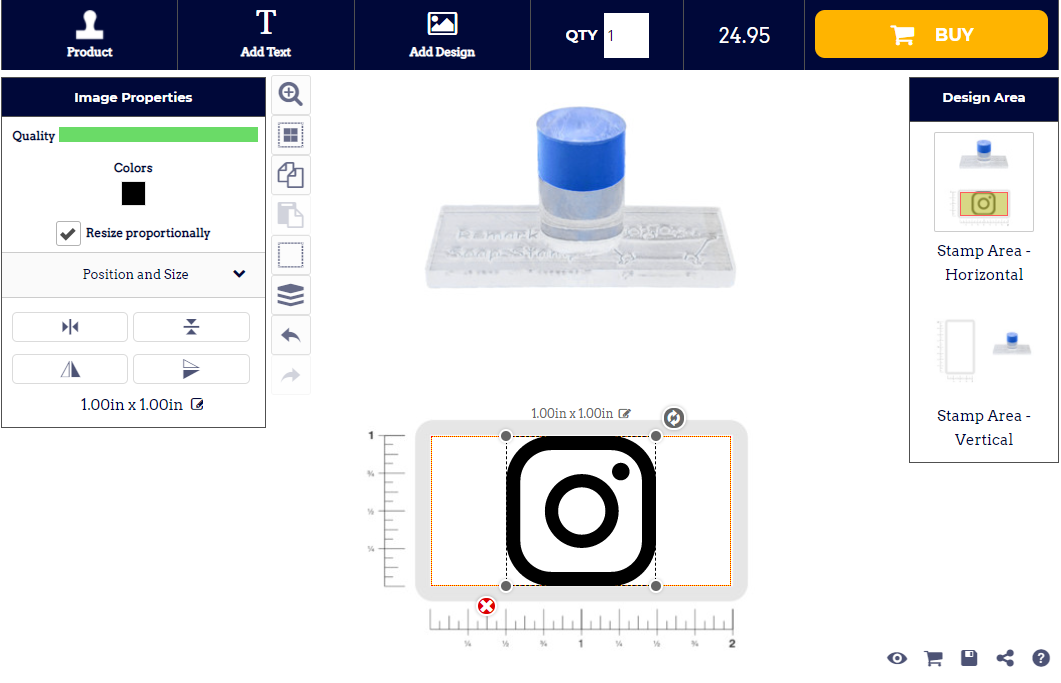
Click on the design or select it from the View and organize layers button in the View Toolbar.
The Image Properties panel will appear on the left side of the Designer.
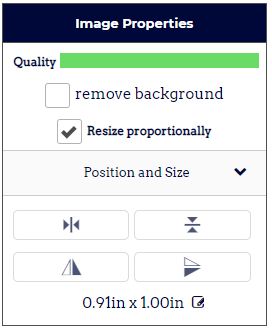
Configure the design as required:
Quality: Shows you a bar indicating how clear the image is for printing. The indicator reflects how well the raster-based graphic is going to print before blurring too badly. If this drops below a certain threshold, the system will warn the customer that their print quality will be compromised.
Remove Background: This will automatically detect and remove the white background from a raster image.
These options are only available for vector designs.
Colors: Shows you the colors currently used in the design.
Resize Proportionally: when this checkbox is ticked, the design will keep its original proportions when you resize it.
Ungroup: click on the link to ungroup the design into its component elements.
These options are available for both raster and vector designs.
- Horizontal Centering controls: Horizontally centers the selected text
- Vertical Centering controls: Vertically centers the selected text
- Horizontal Flip controls: Horizontally flips or mirrors the selected text
- Vertical Flip controls: Vertically flips or mirrors the selected text
- Dimension controls: Change the dimensions of the selected text
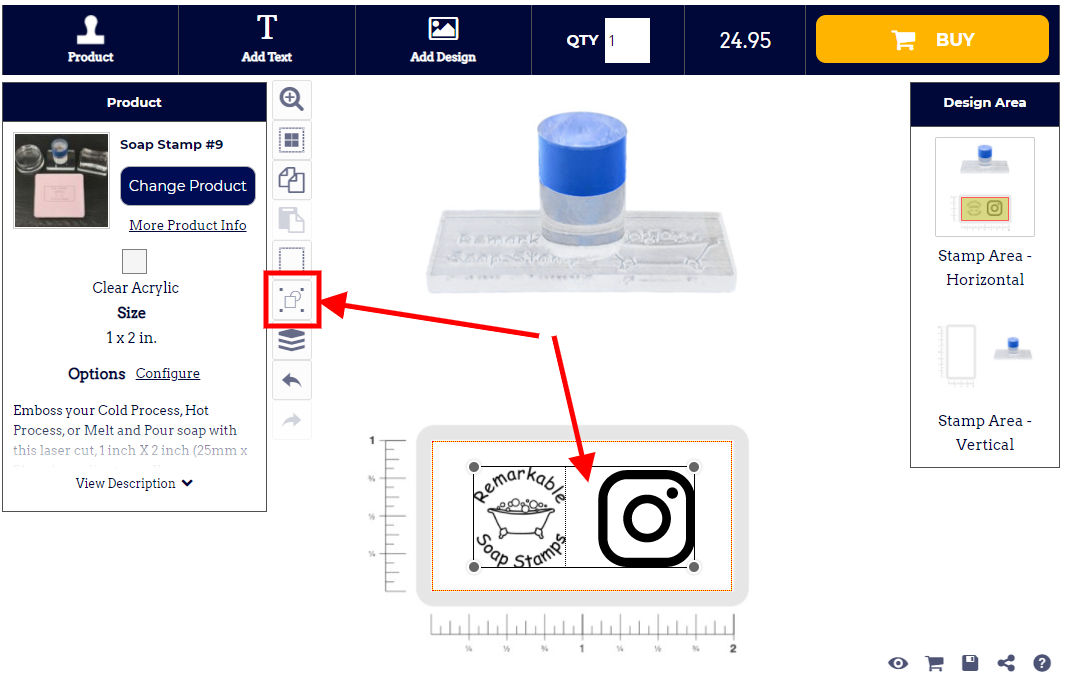
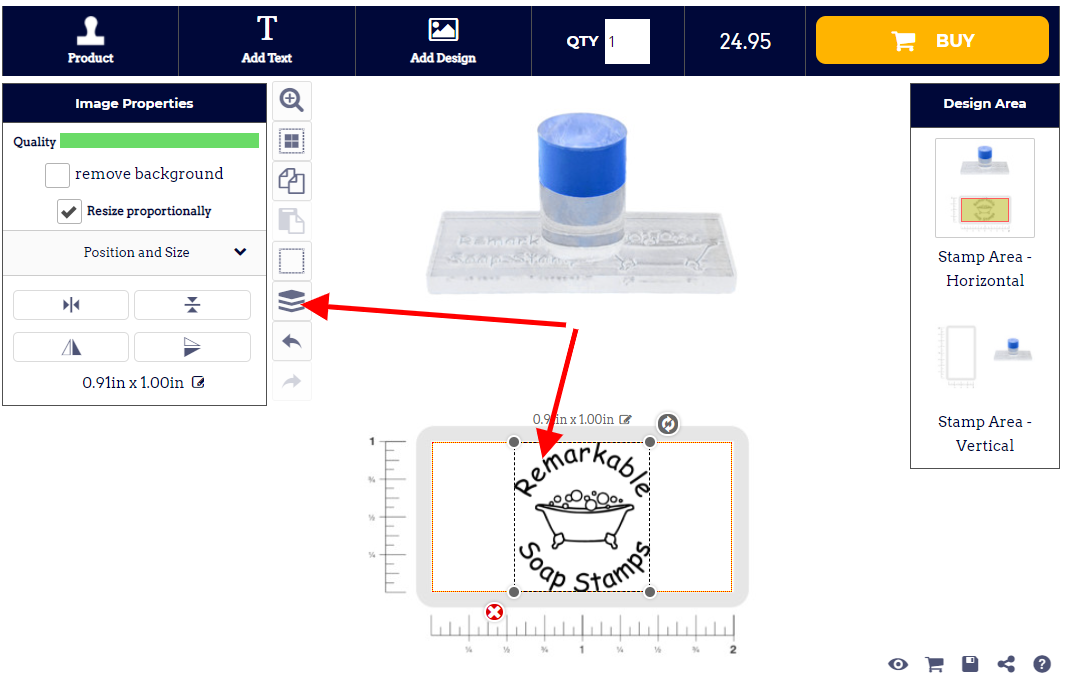
Click on the View and organize layers button in the View Toolbar.
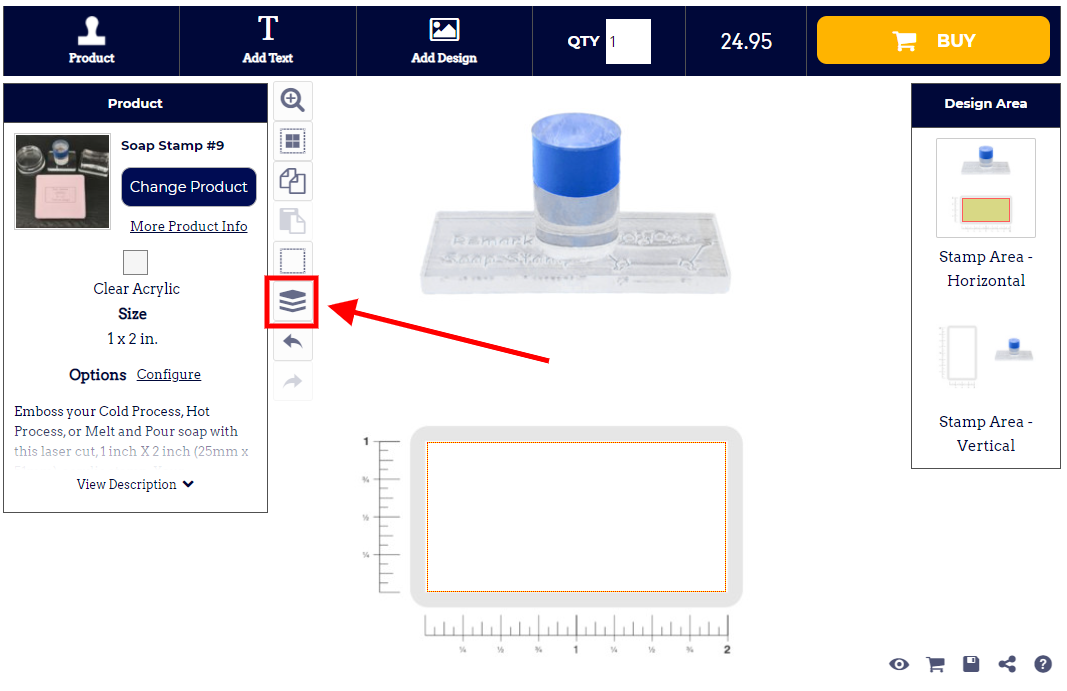
The Layers panel is displayed showing all the text and design objects present in the decoration area.
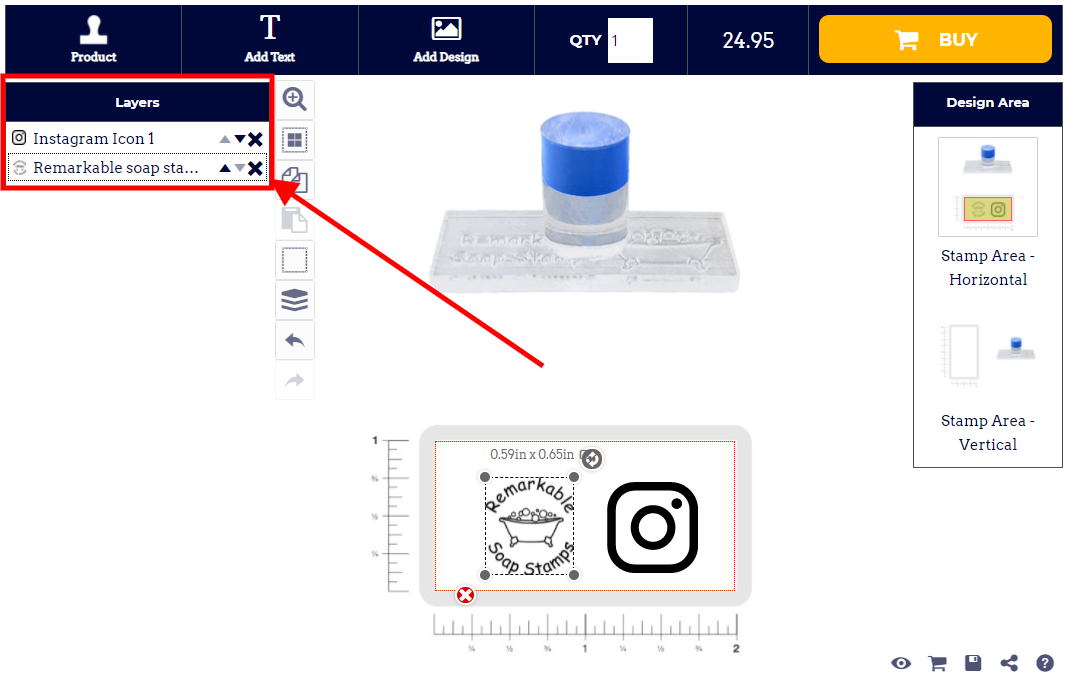
Arrange the elements as required:
You can group elements you have uploaded yourself or from a template design that you have ungrouped.
Holding down the Ctrl key, click on each layer you want to be grouped.
Click on the Group Selected Items button in the View Toolbar.